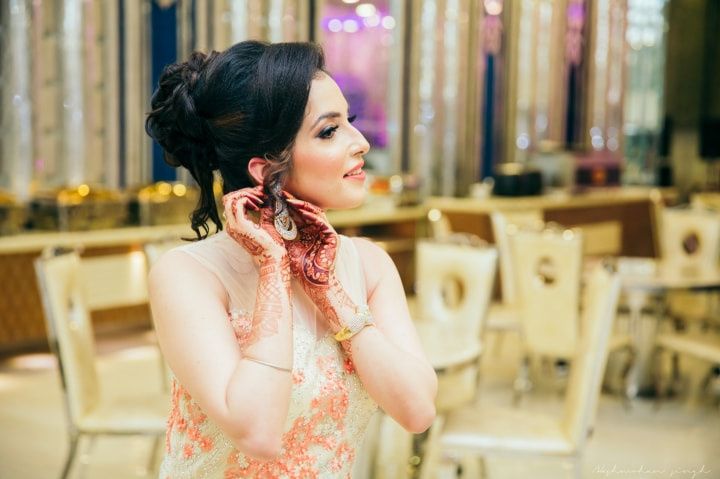
Engagement Makeup Tips for a Radiant, Camera-Ready Look – Your engagement day is an unforgettable event. While it is meant to be a day of excitement, not just a day for showing off your sparkling ring or indicating a beautiful future with your future spouse, it is a day to look and feel your best because everyone is staring at you and taking photos. To ensure that you look stunning in person as well as every time you look back at the photos of that day, you need to know some engagement makeup tips.

This guide breaks down why knowing engagement makeup essentials can set you up for success and look fantastic and illuminated, no matter the time of day or surrounded by the chance of photos.
1. Flawless Base
A flawless, radiant look starts with good skin. Before you even think about foundation, it is essential to prep your skin with –
Hydrate & Exfoliate – In the days leading up to your engagement, be sure to drink plenty of water and lightly exfoliate to remove any dead cells and give your skin a refresh.
Moisturize – Use a good moisturizer, preferably one that works on your normal, combination, or oily skin. If you do not have hydrated skin, the makeup will not blend in with your skin and will not look as fresh as it could.
Primer – Due to the importance of photography for this day, a primer for your engagement makeup is non-negotiable. You can choose a mattifying primer for oily skin, a hydrating primer for dry skin, or a pore-filling primer for a smooth application.
2. Choose a Quality Foundation
Keep in mind when selecting your foundation – Cameras capture everything, even the contradictions between your strands and your face. Select a formula that looks natural, but has enough coverage under these conditions.
Go for HD or Long-Wear Foundations – These foundations are designed for photographic applications and to withstand sweat and flashback.
Blend – Make sure to blend your foundation well using a damp beauty sponge or foundation brush to blend in the neck area and hair line-no lines or harsh edges!
Test in Natural Light – Always, always test your foundation shade at a natural light source so you don’t end up looking orange!
3. Conceal
We don’t want to frighten you, but keep in mind engagement photo shoots and ceremonies can last hours, so any dark circles or blemishes require special attention to ensure you look your best.
Use a Color Corrector – Use a peach or orange color corrector to neutralize the darkness under your eyes before applying concealer.
Brighten the Right Places – Apply a brighter shade of concealer that is going to be a couple of shades lighter than your foundation on the inner corners of your eyes, chin, and forehead to help create a look of lifting.
4. Set it
Nothing is worse than looking at your photos after your engagement or big day came and went, only to realize your base product has moved or smudged. Set your foundation so it doesn’t go anywhere, no matter how much you laugh, dance, or sweat!
Translucent Powder – Dust a translucent powder lightly on your t-zone only to help eliminate shine. Make sure you don’t overpowder as you want to look dewy, not dry.
Setting Spray – Finish setting your foundation with a nice layer of good setting spray to help marry and melt your powders together and set everything together.
5. Add a Natural Flush
Photography tends to wash away our natural color, so don’t forget to include blush and bronzer.
Blush – For fair skin, choose soft, rosy tones, and for medium to deep skin tones, choose deeper peachy-pinks. Cream has great staying power under a powder blush.
Bronzer/Contour – Add a light contour under your cheekbones and below your jawline for a little definition in photos. It will add depth and shadow, making your unique face shape look beautiful.
Highlighter – Having a radiant look is everything. Use a subtle highlighter on the points of your face, cheekbones, brow bones, and the bridge of your nose.
6. Define Your Eyes
Your eyes are the focal point of every photo, so make sure they pop!
Eyeshadow – Soft neutrals and warm tones tend to look well on most skin tones. Add a pop of shimmer to the inner corners for an eye brightening effect.
Liner – Tight lining your eyes with waterproof eyeliner will give you fuller-looking lashes. A soft wing can elongate and lift your eyes.
Lashes – Curl them and apply a volumizing, waterproof mascara. False lashes can also add drama, but keep it chic and go for a more natural look for an elegant effect.
7. Finish Off Your Brows
Brows are the finishing frame to your face and complete your look.
Shape & Fill – Use a brow pencil or powder to fill in any sparse areas. Embrace your beautiful brows for a classic look that can be flattering on everyone.
Product – A clear or tinted brow gel will help you keep your brows in place all day!
8. Pick the Perfect Lipstick Color
Your lip color should balance with your overall look and be enhancing, not overpowering.
Long-Wear Formula – Pick a long-wear and transfer-proof lipstick formula so you are not constantly re-applying.
Lips Prepped and Primed – Exfoliate and hydrate your lips to avoid looking flaky.
Colors with versatility – Soft pinks, rosy-nudes, and peach colors are flattering lip colors with versatility for engagement makeup.
9. Do a Full Trial Run
One of the best engagement makeup tips we have for you is to do a full trial run of the engagement look. You should do this at least once before the day of your engagement –
- Wear it. You can wear the look for a few hours to see how it wears.
- Take selfies. It is important to take selfies with flash and natural light, so you can see how the makeup looks on camera.
- Make a note of any adjustments needed. This can help you make any adjustments before your big day, so there are no surprises.
10. Create a Touch-Up Emergency Kit
Even some of the best makeup can use just a touch-up. Create a small kit with blotting paper, lipstick, concealer, setting powder, etc., to help you do quick touch-ups throughout your day.
Conclusion
Your engagement day is all about celebrating your love and creating memories. The right makeup elevates your natural beauty and gives you confidence, allowing you to shamelessly say “Yes!” to forever. Use these tips for engagement makeup so you can look radiant and camera-ready and feel like the most beautiful version of yourself.
FAQs
How far in advance should I start prepping my skin for engagement make-up?
You want to focus on your skincare (moisturize, exfoliate, and yes, perhaps a facial one week before), ideally at least 4-6 weeks before your engagement day. You are your best investment, and with plenty of time, you can hydrate and focus on yourself as your day approaches. Trust yourself to show up and be the best version of yourself. Just avoid trying anything new or experimenting with products the week or night before to prevent reactions.
Should I hire a professional makeup artist or do my makeup?
It depends on your comfort level and your budget. Hiring a professional makeup artist could give you an exceptional and stress-free day. If you are confident in your make-up skills and want to bring a personal touch to this special day, then doing your make-up may be more significant to you – just make sure to practice your look ahead of your engagement session.


 Call Us: +91 98788 35100
 Whatsapp: +91 98788 35100
 Location